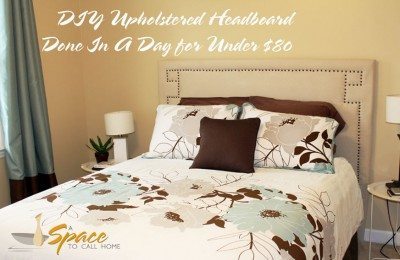
 DIY Upholstered Headboard
Upholstered headboards & beds offer a timeless look to any bedroom and give the room a feeling of luxury. If you are looking to buy one, count on spending from $400-$1000 (just for a headboard, not a bed). I have seen a few at HomeGoods for $200 but they were sold before I had time to take a picture and text my friends. As it turns out, I don’t even have a spare $200 for my guest bedroom (thank you Financial Peace & Dave Ramsey) so I drool over pics on Houzz and Pinterest dreaming of a day when my guest bedroom doesn’t look like something out of a shabby college apartment. I had seen several pins for upholstered DIY headboards on Pinterest and the writers claim it is a super easy project that even a beginner DIY-er can do. After attempting it myself, I have to say they were right. This was by far one of the easiest projects I’ve tried and if the guy at Lowes had not cut my wood pieces the wrong size, it would have been even simpler. Luckily for me, my parents were in town and my dad helped me adjust and cut some pieces to get to get things sized and squared away the way I wanted. I’m going to write this blog as if they pieces had been cut accurately from the start, hoping for your sake your helper at Lowe’s isn’t too busy flirting to pay attention to what he’s doing. Although in his defense, he was a cute little college kid and I’m sure my mom and I looked like great practice.
The Plan
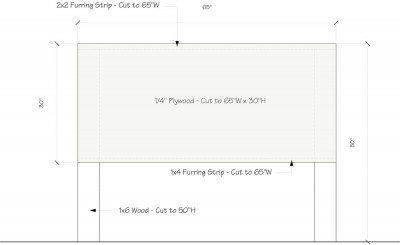
I started by taking some measurements of the width of queen mattress & frame and then measured from the floor to determine the height I wanted. I decided on a 65″ width and an overall height of 50″. If you already have a bed frame and you are planning to bolt your frame to the headboard, it’s important to measure the distance between the brackets of the frame and space the headboard legs accordingly so your bed frame will line up with the legs of the headboard. I sketched up what I thought I would need supply wise after reading a couple blogs and headed to Lowes. 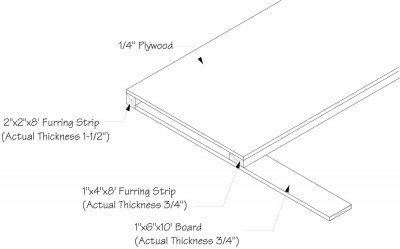
Supplies
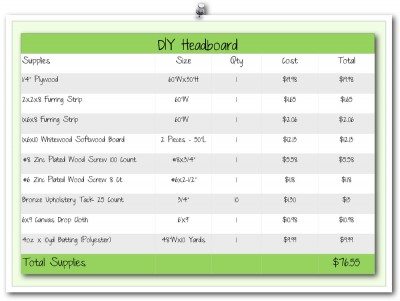
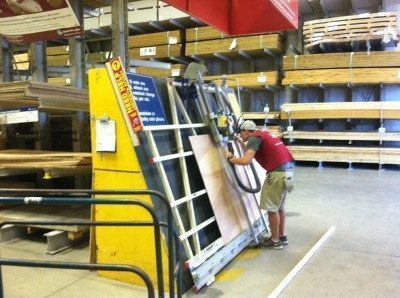
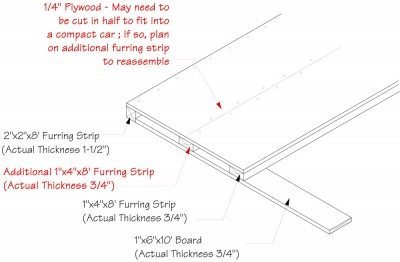
- (1) - 1/4″ x 4 x 8 Hardwood Underlayment Plywood - cut to 60″W x 30″ H (for a queen bed)
- (1) - 1 x 6 x10′ Whitewood Softwood Board - (legs - 2 pieces cut to 50″L)
- (1) - 2 x 2 x 8′ Spruce Pine Furring Strip (top piece, cut to 60″W)
- (1 or 2) - 1 x 4 x 8′ Spruce Pine Furring Strip (bottom piece, cut to 60″W)
- (8-10) - packs of Bronze Furniture Nails (125ct each)
- (1) - 6×9 8oz. Canvas Drop Cloth
- (1) - Pkg, 100ct #8×3/4 Zinc plated wood screws
- (1) - Pkg 8ct #6 x 2-1/2″ Zinc plated wood screws (to attach 2×2 furring strip to 1×6 leg)
- (1) - Heavy Duty Staple Gun
- (1) - Pack heavy duty staples
- (1) - Soft n’ Crafty polyester batting
Other tools we used (but I didn’t need to purchase) included:
- (1) - Electric Drill
- (1) - Hammer
- (1) - Rubber Mallet
- (1 ) - 1″ Blue Painter’s Tape
The Build
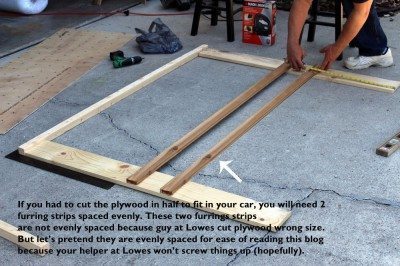
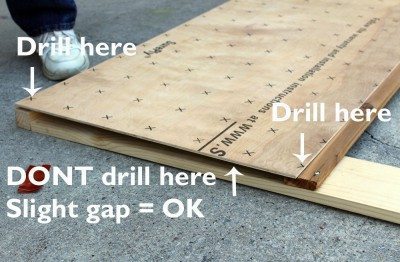
Assembly should be relatively easy since all the pieces you need have been expertly pre-cut by the associates at Lowes. Mine was slightly more difficult since my helper at Lowes screwed things up. But for this blog, I’m going to skip over the parts we had to re-adjust and pretend I’m building the version that had to be cut in half to fit in my car (see left sketch). If you have a truck or can mount the plywood to the top of your car, follow the sketch at the top of the page that shows the plywood in 1 piece.
First, lay out the legs and 2×2 furring strip and use a carpenters square to make sure they are at 90 degree angles. The legs need to be straight, otherwise the headboard will wobble and people will make fun of you. The overall width should match the width of the plywood. Lay the 1x furring strips at the bottom (and middle if you are re-connecting the plywood pieces) to be sure everything lines up square. If you are starting get confused, enlarge the sketch (or better yet print it out) while you’re reading this and hopefully it will make more sense.) 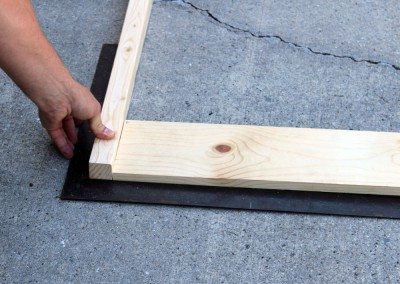
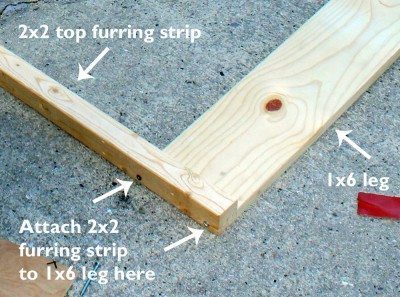
[clear]
Finish the Frame
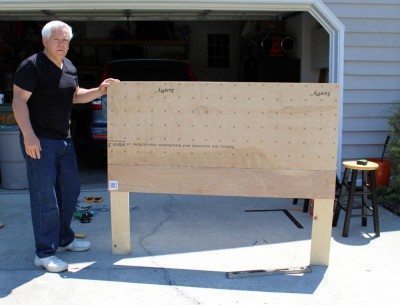
Your headboard frame will look similar to this (without the handsome, father type figure on the left). Without the extra mess we had to deal with, the frame assembly would have taken a little over an hour. Add 1 hour for shopping time and we’ll call it 2 hrs for the entire frame. Not bad, eh? Let me take this moment to thank my dad for helping me on this project. To his dismay, every time he visits I put him to work on some sort of project instead of doing something much cooler like watching a marathon of Masterpiece Theater. He’s a good sport and I appreciate his help. Read on to see how to wrap the frame in part 2 of this blog, DIY Upholstered Headboard Part 2 - Upholster the Frame.

