DIY Upholstered Headboard Part 2 - Upholster The Frame
Part 2 of this blog finds us with a finished frame. To read about the frame build check out DIY Upholstered Headboard Part 1 - The Frame. After assembling the frame outside on my driveway, I gave the edges very light sanding to make sure the batting didn’t snag on any errant pieces. We moved inside and lay it on the floor in my son’s playroom. I made the mistake of waiting to steam & iron the canvas until we were ready to put it on. That put a major snag in my timeline because it took FOREVER to get all the creases out and I was working during naptime. Needless to say, we didn’t finish during naptime but had I ironed the canvas before, we probably could have finished this step in 1-2 hours.
Wrap the Frame

 I rolled the batting out and cut it long enough to cover the entire front and wrap all the way around the legs. I used a regular pair of kitchen scissors to cut the batting and they worked fine. I choose to use 3 layers of batting. Two was not very cushy and 4 would have made it difficult to staple or nail anything to it due to it’s thickness. So 3 layers it became. Once the layers were cut, we flipped the frame face down with the batting beneath it. I folded the edges over on the top and started stapling. Once the top was done, I moved onto the side. It is very important that you staple into the furring strips and legs and NOT into the plywood. The staples will poke through the plywood and give someone a very unpleasant prick if they lean against it. It took a decent amount of force with the staple gun to get through the 3 layers, and even more on the top corners where there was batting from the top fold AND the sides (think 6 layers) to staple down. I decided last minute to wrap the legs with batting also, so we cut some leftover strips and wrapped & stapled almost to the bottom of the legs.

[clear]
Wrap the Batting
Once the canvas was free of creases & wrinkles, we lay it flat on the floor and then moved the headboard on top of it. We used the same process to wrap with the canvas that we had with the batting. I started with the top and pulled the canvas taut. We were careful not to pull too tight because the fabric will start to show the strain if it’s pulled too hard. It was similar to gift wrapping a package. The corners presented a bit of a challenge. We could have spent hours trying to get the corners to wrap perfectly flat, but to be honest I didn’t care that much about how they looked. Most people don’t spend a lot of time examining the corner of their headboard and I am no exception. I wanted the corners clean, but I didn’t want to spend a lifetime trying to get them to “furniture quality”. So we settled on a clean fold and moved on.


[clear]
Cut The Excess
All the parts of the headboard that would be visible were finished. The last part of this step was cleaning up the back and wrapping the legs. We opted to completely wrap the legs with the batting & canvas. To do this, we cut a rectangle shape out of the space between the headboard legs, leaving enough fabric to wrap each leg. I stapled the leftover fabric (behind the frame) to the lower furring strip. Again, not furniture quality but no one will ever see the back so I didn’t worry with it. 


[clear]
Time For Nailheads
The last step in this process was the one I was dreading most. All my parental guidance had left town and my mom laughed at me when I told her I thought the nailheads would be easy. So, armed with my rubber mallet, tape measure and a few uninterrupted hours, I tackled the nailheads.
I had seen a blog that recommended to use blue painters tape to map out your pattern before you start nailing. Great idea! I carefully installed painters tape about 2″ from the edge of the headboard all the way around. As soon as I saw the rectangle I had planned on, I was bored with it and decided to go for a fancier design. I googled some headboard images and settled on the square “pac man” pattern you will see in the AFTER image.  I tore the painters tape and readjusted it to make the 3″ square pattern in the corners. So far, so good. I nailed from the bottom up, figuring if I screwed something it would be less noticeable. That was true. It was also very easy to take the nailheads out with needle nose plyers if I started veering off path or messed my spacing up. I chose not to be crazy careful with the spacing. I knew from a distance it just wouldn’t be THAT noticeable if they weren’t perfectly spaced and to be honest I was ready to get this thing done. It would have taken hours to meticulously place and readjust every head that was a little off and I wish I could say I was super detailed oriented, but I’m not. I’ve accepted that about myself. If fact, I kind of like the fact that I’ve learned to let little things go. (I think you have to when you have kids). Anyway, back on track. I nailed up and around the headboard, taking out and redoing a few along the way, but for the most part just followed the tape trail and hoped for the best. The entire process took a little over an hour and I had a little blister on my thumb. Otherwise it was painless and a lot less involved than I feared.

[clear]
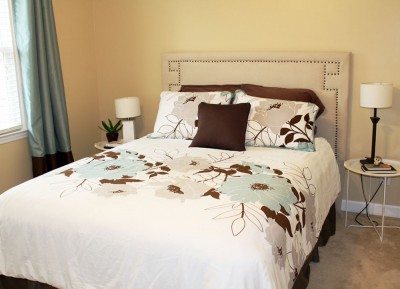
Finishing Touches
The nailheads were finished and I was so excited to move the headboard upstairs to see how it looked! I was excited until I saw ALL the wrinkles and areas that were pulling & tugging from the nailheads. So I took out my trusty iron (I gotta use it sometime otherwise it might leave me) and I turned the steam setting on high. It took about 10 minutes of steaming to get the funky areas to lay flat, but they finally did! I made up the bed and VOILA! Headboard done! It looks SOO much better than what was there before (a whole lotta nothing good). The bedding set could definitely use new euro pillows, sheets and lint brush to get rid of all the random dog hair but that will have to wait. Next up for this room is a coat of paint to get rid of the awful “pancake batter” color on the walls and some new or refurbished nightstands and matching lamps. We are on our way to an amazing guest bedroom and I can’t wait to share!